Tag Archives: vegan

Meatless Monday: 2 Ingredient French Toast (2 Ways)

applesauce french toast

Mott's Strawberry Applesauce French Toast

And, no, one of those ingredients is not eggs. Or egg substitute.

This is a perfect recipe for days when you wake up wanting a real breakfast but the fact it is snowing in April makes you so adverse to the thought of doing anything that you cannot scrounge up the energy to find more than two ingredients–i.e. yesterday.

Or really just any day.

Yogurt French Toast
makes 1 toast

  • 1/2 6oz. container of yogurt (any flavor)
  • 1 slice bread old bread (or lightly toasted bread)

Applesauce French Toast
makes 1 toast

  • 1/4-1/2c. unsweetened applesauce (any flavor)
  • Spices or seasonings of choice
  • 1 slice bread old bread (or lightly toasted bread)

    →Put the yogurt or applesauce in a shallow container that is wide enough to hold your bread. If your yogurt or applesauce is thick, mix it with enough water to make it the consistency of pancake batter. Add in any spices or seasonings you want.

    Put the bread in the yogurt (or applesauce) and let it soak a little. Flip it over to get the other side.

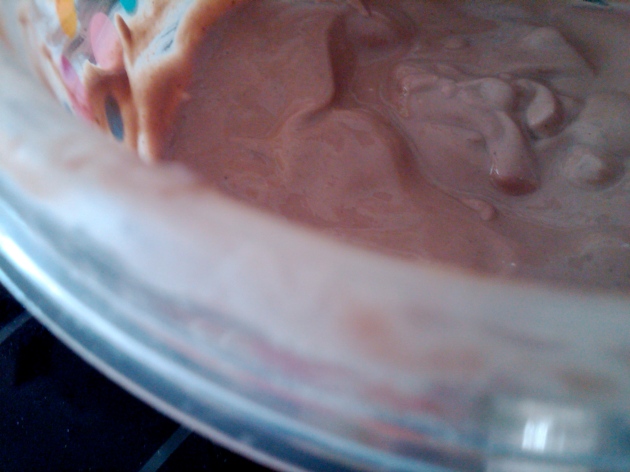
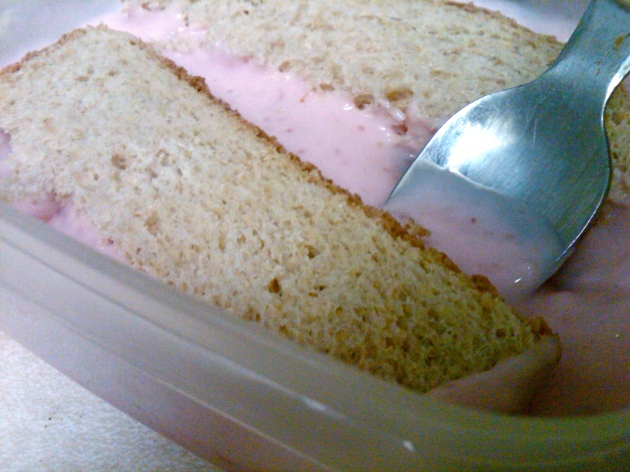
    bread soaking

    Bread soaking in Cherry Vanilla yogurt

    Spray a small/medium saute pan with nonstick spray. Let it sit on medium heat for a minute (just enough to preheat it).

    Take the bread out of the yogurt or applesauce mixture and put it in the pan. Top with more yogurt (or applesauce). Flip it after about a minute (or when the bottom is brown). If there’s any left, top with some more of the “batter”.

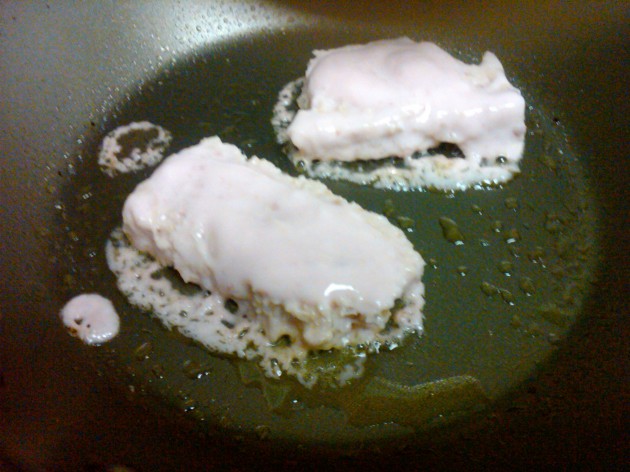
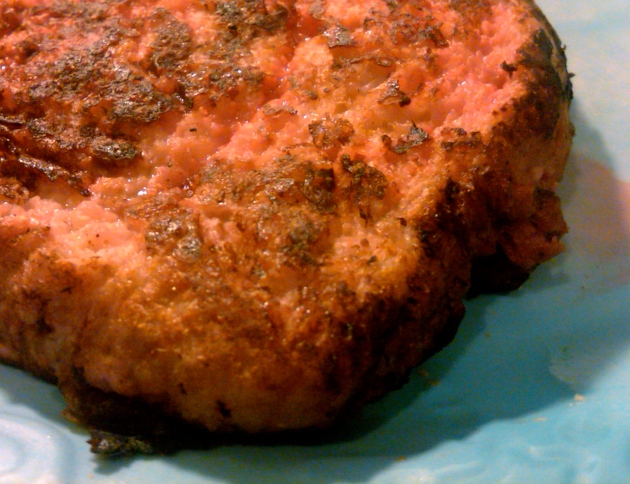
    yogurt toast cooking

    Admittedly, a little too much yogurt on top...

    Once both sides are brown, take it off the pan and eat it while contemplating whether April snow showers will bring May flowers.

    Meatless Monday: Calcium-Rich, Cow-Free Chocolate Yogurt

    soymilk yogurt

    Remnants of my morning yogurt binge

    To me, a world without yogurt is a woeful world, unimaginably grim and full of longing. If being vegan meant I could never eat yogurt again, I don’t think I would even be able to consider the possibility. Eggs I can easily live without and, milk, I don’t drink very much of, but little 6 oz. cartons of diet yogurt consume most of my food stamps. And that’s not even counting the soft-serve.

    Given the nutritional stats of store-bought soy yogurts, this horrible nightmare could have easily become a reality. But I am lucky to have grown up in a house where making yogurt was not only common, but also free of expensive hardware (I’m still not quite sure what a “yogurt maker” is, but, either way, you don’t need one).

    Yogurt is among the foods most people file under “impossibly hard to make/never going to attempt”. I can’t imagine why, though, seeing as how it’s probably one of the simplest things you can make. Admittedly, there is a lot of luck involved: I’ve been making yogurt since high school and I still have occasions where it doesn’t set.

    A few factors are critical to yogurt making: cleanliness, temperature and cleanliness.

    Really, I can’t stress it enough: the yogurt will not set if anything that touches either the soymilk or the yogurt starter is even the slightest bit dirty. And I don’t mean “crusted” dirty–I mean “microscopic bacteria” dirty. You don’t want any other bacteria to prevent yours from thriving, now do you? (By “yours,” I mean the bacteria we associate with yogurt). Safest bet it to sterilize everything in boiling water, but, for the lazy among us *waves*, a good washing and a little caution will do.

    As for the temperature, you will hear different things. My mother always said that the milk should be on the edge of hot and warm, but nowhere near boiling. It seems to work well enough for me. If you have a thermometer, I believe the official guidelines state 118*F, but, if you don’t, air on the side of “warm” since too hot kills while too cold only slows.

    soyslender

    Chocolate!

    For my yogurt, I chose to use chocolate Soy Slender because last week (when I made this) was National Chocolate Week and Soy Slender was cheapest at Meijer. I’ve done this with other soymilks before (back when they used to carry my favorite brand) and it’s worked out just the same. Keep in mind, homemade yogurt (soy or otherwise) will never be as thick as store bought yogurt unless you add some kind of thickener to the milk after culturing. Want to know why? Pick up any yogurt container, read the ingredients, and you’ll find out.

    Mostly Fool-Proof Soy (or Dairy) Yogurt

    • CLEAN bowl with lid (metal is best, followed by glass and finally plastic)
    • CLEAN whisk, spoon, fork, knife, whatever (just don’t use your finger)
    • A good-size spoonful yogurt (buy a small container of soy yogurt or regular yogurt labeled with the “active culture” symbol/disclaimer and take a spoon out…if you want to keep it vegan but don’t want the sugar and fat, have someone else eat it :D)
    • Milk/soymilk (any flavor/fat content)

    →Heat the soymilk (milk) to 118*F or till it’s “warm” (118*F is hotter than warm but, if you read the essay-length reasoning above, you’ll see why this is better).
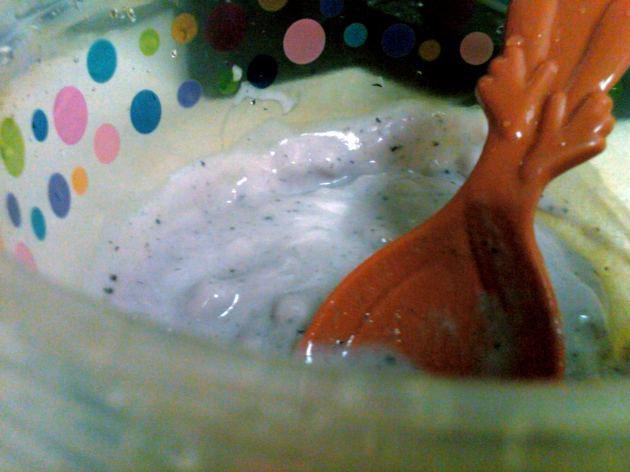
    A Spoonful of Blackberry Yogurt

    Put the yogurt in the bowl and whisk well. Slowly add the soymilk (milk), whisking continuously so as to evenly incorporate the yogurt (yogurt chunks = bad).

    Cover the bowl and incubate. (This is hard for impatient people like me, but don’t check/move the bowl around for at least 4-7 hours depending on your temperatures. JUST LET IT BE!)

    There are a few methods of incubation. You want the temperature to be around 100*F (+/- 20*). If you live in a warm climate where the temperature of the room is 80+, all you have to do is leave the yogurt sitting on the counter (not in direct sunlight).
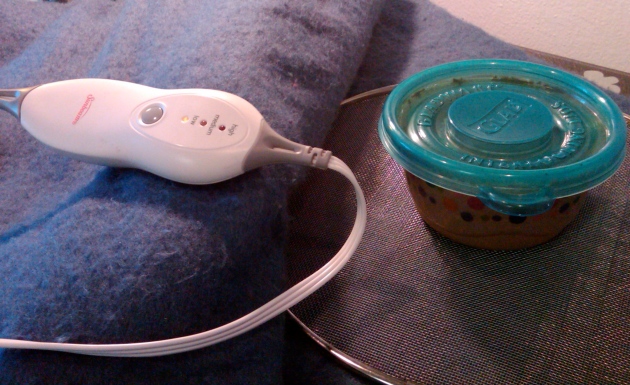
    incubator

    Improv Blanket Incubator

    To artificially achieve the same effect, place the bowl in the back of the oven with the light on (DO NOT TURN THE OVEN ON) and close the door. Or place it in the microwave with the light on (once again, DO NOT TURN THE MICROWAVE ON). I don’t like the idea of not being able to use my microwave/oven for a long period of time, so I wrapped the container in my heating blanket and left it on at low power. Seemed to do the trick.
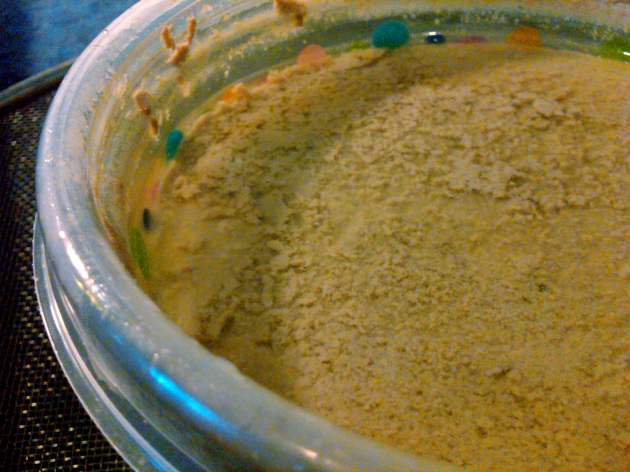
    unstrained yogurt

    Not the most appetizing sight. Straining wasn't optional this time.

    After about 8 hours, you can check to see if the yogurt is done. The longer you leave it, the thicker and more sour it will become. I stopped culturing at about 6 hours because I didn’t want it too sour (it’s chocolate!). You can let it culture for up to 12-14 hours, depending on how you like it.
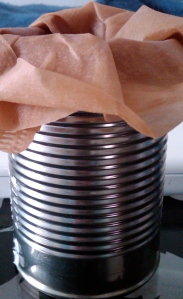
    DIY strainer

    Who needs cheesecloth?

    To make thicker yogurt, strain it after you’re done culturing. A cheesecloth with a weight over it would be ideal, but I didn’t have one so I put a few coffee filters over a metal can and let gravity do it’s job. Takes longer, but good things come to those who wait, right?
     

    Meatless Monday: Vegan Sushi

    meatlessmondaylogo

    courtesy of Meatless Monday

    I’m sitting in the chemistry lab right now. Not doing any chemistry, but that’s probably for the best.

    I can’t really think, mainly because the Sri Lank-an kid asked me to play Indian music and so now my computer is blasting “Hindi filmi” songs. How am I supposed to think with Shah Rukh Khan music playing in the background?!

    For anyone following the trend, today is Meatless Monday, which is the main reason I am posting.

    Please excuse the incongruence of the post. Anyone who speaks two languages (or more) might understand the brain confusion that results from writing in one while listening to another. It’s all I can do to not writing in Hindi.

    It’s ironic that today’s meatless (vegan and budget-friendly) recipe is from an entirely different country.

    sushi

    It's sushi time!

    Easy Vegan Sushi (with and Indian twist)

    makes about 6 rolls (depending on how you cut it)

    • Nori sheets (available in some grocery stores and  most ethnic foods stores)
    • Sushi rice, cooked (I cheated and used the sprouted brown sushi rice I had leftover from an Annie Chun’s meal)
    • Baby corn
    • Sliced mini bella mushrooms
    • Vinegar (I went with a mix of apple cider and red wine)
    • Dipping sauce

    Dipping Sauce

    • Soy sauce
    • A few pinches garam masala
    • Garlic powder or minced garlic cloves
    • Ginger paste or, even better, fresh grated ginger

    →Make the dipping sauce by mixing the ingredients and letting it sit, covered, for at least half an hour or, even better, overnight.

    If you have time, marinate the mushrooms in the vinegar overnight. If not, “quick marinate” them by placing them in a bowl with the vinegar and microwaving for about a minute (covered).

    Place the nori on a clean, dry surface rough side up. If you have a bamboo mat, that’s great, but I didn’t so I put mine on a cutting board.

    Spread the sushi rice evenly over the nori sheet, leaving an inch or two at once end (this will be the “sealing” part). Place the baby corn and “marinated” mushrooms in a thin line across one side of the sushi (the side farthest from the side without rice).

    Roll the sushi and slice it. I would try to explain the rolling process but it was my first time, so I’m not sure I’m qualified. For a step-by-step (with pictures!) on rolling sushi, check out Make My Sushi’s illustrated guide.

    If you’re brave, attempt chopsticks. Or do it Indian-style and get your hands dirty.

    Green Living = Economical Living

    meatlessmondaylogo

    courtesy of Meatless Monday

    First it was rainbow, then chrome; now, more than ever, we (as a society) seem to have developed a liking for the color green. For the record, I have been hugging trees since the early ’90s. Seriously, there are pictures of me hugging trees as a 3-year-old (I felt stepping on them would be “mean”). Sometimes I even indulge in a little self-flattery and pretend I was one of the founders of this trend. I did convince the menu planners of the new college cafeteria to start offering vegan and vegetarian options (other than morningstar burgers and peanut butter) back when it first opened. And I did try to talk my school’s theatre department into recycling instead of burning the wood used for the set.

    Let’s face it, though: I am not a “change the world” kind of person. Don’t get me wrong; I would love to change the world as much as anyone who’s still young (and naive) enough to afford the idealistic world-view most people have in their early 20s. But I am not (nor ever will be) a socially-competent individual.

    Needless to say, I have long given up on changing the world. I’ve resigned myself to a life of solitary tree-hugging and boca-burger eating, which is probably why I didn’t immediately recognize the progress other (more socially apt) tree-huggers have made. But I’m beginning to notice something: boca burgers are now available at mega-marts, my quiet corner has turned into a noisy room, and 1/7 of year is now dedicated to “PETA eating”….

    I’m not going to sit here and pretend that living a “greener” life is easy or that it’s always the cheapest option (have you seen the price tags on a lot of vegetarian meat options lately?!), but it can be affordable. You don’t need to switch to expensive organic cleaning products, buy a hybrid car, or even invest in overpriced veggie burgers to help the environment or non-human animals.

    As the “Meatless Monday” movement suggests, even eating meatless just one day of the week can make a difference for both the environment and your health. In honor of the movement, I’ll be posting a new vegan, budget-friendly recipe every Monday (since everything’s already vegetarian here, I figure I should take it up a notch).

    For this week, here’s a list of recipes (from my blog) in honor of being vegetarian (or vegan)–the budget friendly way.

    DIY Sponge Cake (microwave-friendly)
    DIY Cookies (microwave-friendly)
    Rosemary-scented Balsamic Spaghetti Squash with Peppers and Mushrooms
    Pistachio Butter and/or “Nutella”
    Curry-spiced Green Beans
    Zingy Trees of Goodness (i.e. Spiced Roasted Broccoli)
    Curried Lentil Loaf with Chatpata Butternut Sabzi
    …for even more ideas, click on the “vegan” tag

    Mix ‘n Match Cake (Healthy AND Low-Calorie)

    This site has moved. Please click on the following link to read this post:

    http://measuredinpinches.com/2011/03/11/mix-n-match-cake-healthy-and-low-calorie/

    Adventures in Molecular Gastronomy: Vegan, Low-Calorie Sponge Cake

    This site has moved. Please click on the following link to read this post:

    http://measuredinpinches.com/2011/03/06/adventures-in-molecular-gastronomy-vegan-low-calorie-sponge-cake/

    Slightly Sweet but Always Stringy Spaghetti Squash

    This site has moved. Please click on the following link to read this post:

    http://measuredinpinches.com/2011/03/01/slightly-sweet-but-always-stringy-spaghetti-squash/

    Healthy, “Any Way You Like” Cookies (Microwave-Friendly)

    This blog has moved. This post can now be found here:

    http://www.measuredinpinches.com/2011/02/25/mix-and-match-cookies/

    Thank you.

    The Adventure Continues: Sprouted Wheat Finds it’s Soulmate in the Pistachio

    Pistachio and Sprouted Wheat Pita

    Truly a match made in heaven

    All philosophical musings and deep words have been pried out of me by this miserable excuse of a day. So, in an effort to keep this blog from becoming a complete vehicle for my pointless rants, I’m going to try to avoid saying too much. I think I’ve already said too much.

    I don’t know if you remember the pistachio butter I made awhile back or that I said it was insanely strong. I did though and it was. I am happy to report I have found a most perfect of uses for it. Green sprouted wheat berries. Opposites attract and these two are certainly opposites in flavor; but, don’t forget, birds of feather flock together–for that we have the intensity of said flavor.

    It’s a match made in heaven.

    Pistachio and Sprout Pita

    Opposite, yet alike-the definition of perfect


    Adventures in Sprouting: Wheatberries

    Bowl of SproutsOne of my high school friends introduced me to the concept. Of course, I knew what sprouts are-I love alfalfa sprouts in just about everything-and I had heard about the raw food diet in relation to them. I had just never considered the possibility of making them myself. Until now.

    Thanks to my good friend (let’s call him…J *waves to J*), I now am in possession of my very own sprouting jar. It’s not a very complicated contraption, but judging by these wonderful greens, it’s a pretty useful one.

    I was afraid the wheatberries wouldn’t sprout. They were old (think years, not months), the water wasn’t “distilled,” the temperature was probably a little off…but these little balls of wheat couldn’t care less.

    Germinating sprouts

    Germinating sprouts

    I “germinated” (a.k.a. soaked) the wheat berries for about 3 hours. Then rinsed them, then drained them and, finally, just left them in my cupboard, rinsing occasionally. After about 2 days, I began to see little bits of white at the tips of the berries. The next morning, I awoke to long tails. I failed to heed the warnings of the sprouters before me and decided to let the wheat berries sprout some more before putting them in the sun to “green”. Big mistake.

    Apparently, if you let wheat berries sprout too long and/or green, they become sickeningly sweet. I can’t believe I’m saying it, but here it is: they are too sweet for me to eat. Yes, it’s true: I have finally found a substance too sweet for my exorbitantly acquainted sweet taste buds.

    A sea of sprouts

    A sea of sprouts

    Now…all I have to do is find a use for these. I know, I know, I should just make wheat grass, but that just requires so much extra effort. And then I would have to do something with the grass. Suggestions?